How to Do
Botanical Illustration in Watercolor
|
Botanical Illustration is at the intersection of art and science. Observe and study plants in nature. Learn and practice drawing and watercolor painting. Put it together to make luminous, lively, and realistic plant portraits. Follow the steps below to see how botanical artists do their artwork.
1. Begin with a careful,detailed sketch
Drawing is the first step of a watercolor painting. Begin by sketching from a live subject. You can start off loose or you can start off careful, but ultimately you create a precise line drawing. Use a 2H pencil to transfer the line drawing to140lb watercolor paper. These lines then become "guidelines" for the watercolor painting.
|
2. Work up a value study in pencil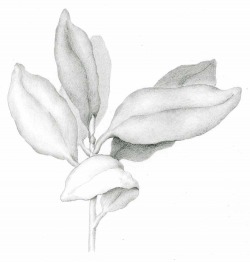
Capturing light on form is essential. Before even picking up a brush, you need to resolve the values, or the range of darks and lights within your drawing or painting. Place a piece of tracing paper over the line drawing that you've done and begin shading with pencil. Make sure there is a consistent, strong light source and really study the light as it falls over the form of your subject. This value study becomes a resource to look back at as you paint your subject.
|
3. Pale washes are a good way to start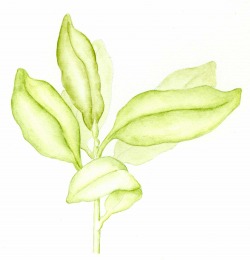
Begin with a layer of pale wash. Some artists lay in a flat wash and others start right in with graded washes. Choose the lightest hue that you might see in a highlight area or a somewhat brighter hue that you might like to see shine through your outer colors. Make a plan for painting--you might paint over the whole subject at once, or you might complete one small area before moving to the next.
|
4. Second layer washes define form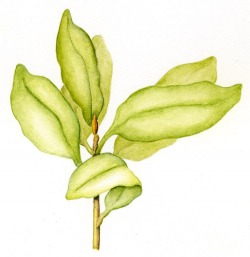
After the first layer has thoroughly dried, begin the next layer of wash. Keep the wash pale and build intensity by adding on more layers. Keep in mind light on form and follow the value study that you made. Use graduated tone and maintain white for the highlights and be sure to let some of the first pale wash "shine" through.
|
5. Additional layers of color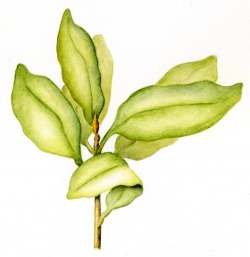
Become more precise in the placement of your painted areas. Create darker shadows by layering in first analogous color and then, as necessary, complementary colors. Adjust your values as you go along, maintaining light areas for the highlights, darker shadow areas, and graded areas to emphasize form. Pay close attention and paint all details slowly and carefully.
|
6. Final analysisCheck over your work for any final color corrections. Finish your work by sharpening up (or softening) edges and adding in any final details.
|
